
II106700-7
Rev. -
Page 67
m. Install the 10 bolts (5/16 18 x 1.250 LG), 10 lockwashers (5/16 ID), and
10 flat washers (5/16 ID) through the 10 holes in the passenger side of the Roof
Armor Panel. Hand-tighten the bolts.
NOTE
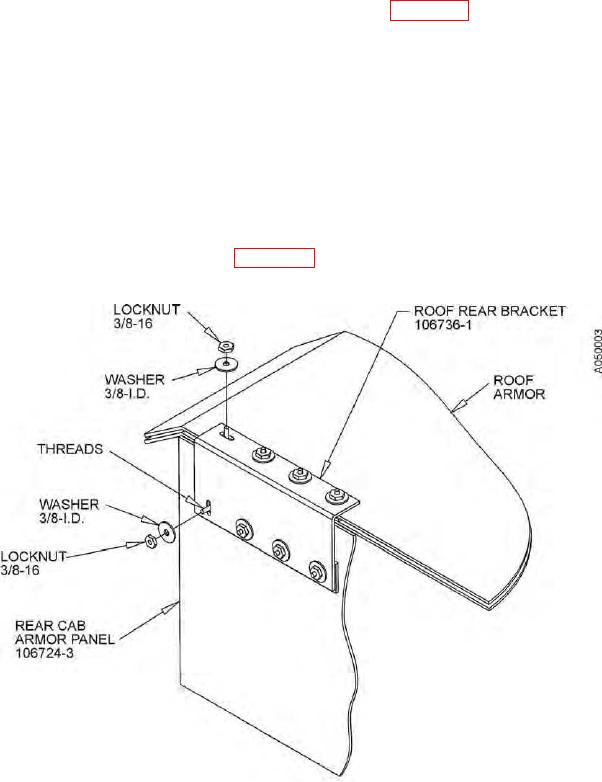
Use shims (P/N 106796) on the mounts between the Rear Cab Armor Panel and the
Roof Armor Panel Rear Bracket (P/N 106736-1) (See Figure 42).
n. Install four bolts (3/8 16 x 1.500 LG) and four washers (3/8 ID) through the Rear
Cab Armor Panel from inside of the cab.
p. Place Spacer (P/N 106796-1) over the exposed threads of the four previously
installed bolts (3/8 16 x 1.500 LG).
r. With the Roof Armor Panel in place, remove the locknuts loosely securing the
Rear Studplate (P/N 106780-2) to the Roof Armor Panel.
s. Install the Roof Rear Bracket (P/N 106736-1) over the exposed studs of the
Rear Studplate (P/N 106780-2) and over the four bolts with a shim through the
Rear Cab Armor Panel (See Figure 42).
Figure 42. Position the Roof Armor Panel Rear Bracket.