
II106700-7
Rev. -
Page 37
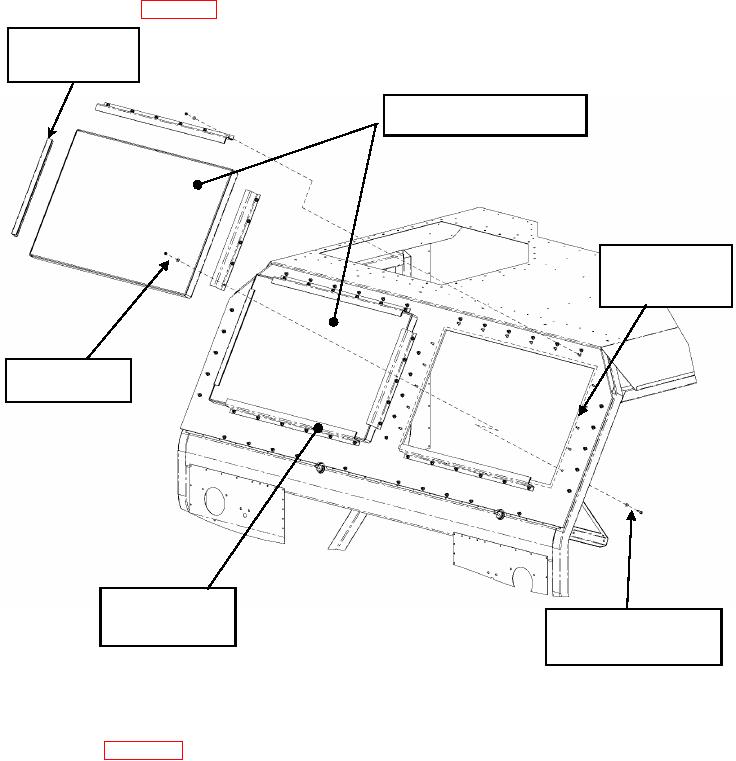
s. Loosely attach the two lower Windshield Retaining Brackets (P/N 113383-1-103)
using 0.250-in fasteners to the Windshield frame, see Figure 21. Set the Windshield
Armor (P/N 113381-1) on the Retaining Brackets and over the openings of the
Windshield Frame (P/N 106721-1). Complete the installation by securing the
Windshield Armor in place, using the remaining Windshield Retaining Brackets
(P/Ns 113383-1-103 and 113383-3-103), and tightening all the 0.250-in. fasteners, as
shown in Figure 21.
Window Retaining
Brackets (Qty 4),
P/N 113383-3-103
Windshield Window Assembly,
P/N 113381-1
Urethane Sealant
around perimeter
(dashed line)
Nut 0.250-20,
Washer 0.250 ID
Window Retaining
Brackets (Qty 4),
Hex Head Bolts,
P/N 113383-1-103
0.250-20 x 1.000 Long,
Washers 0.250-In ID
Figure 21. Armor Windshield installation.
t. If this is the first time the Windshield Armor has been installed on a vehicle, apply the
Cleaning Decal (P/N 104301-1) to the lower left hand corner of the Windshield Armor
(see Figure 22) so that it does not obstruct the driver's / passenger's view. Remove
the protective covers from the transparencies.