
II106700-5
Rev. B
Page 52
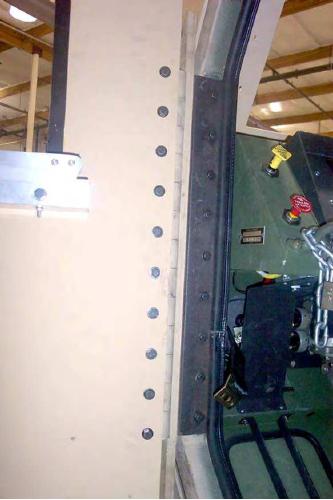
Figure 32. Install the Armored Door Assembly to the cab (driver's-side door shown).
c. Check the Armored-Door-Assembly-to-cab fit and alignment, and adjust the door
and/or latch pin as necessary until the alignment is correct.
NOTE
If necessary, washers or shims may be placed between the door latch assembly and the
door to adjust the latch inboard if the latch is not completely engaging the striker. Shim
adjustment should not exceed 3/16 in.
d. Tighten the ten bolts (3/8 16 x 1.500 LG) to secure the Armored Door Assembly in
place. Torque the bolts to 18 ft-lb.
NOTE
The protective paper that is attached to the transparent Window Armor Panels is
removed during the first installation. Subsequent Window Armor Panel
installation will not have this protective paper, and the cleaning decal will already
be installed on the Window Armor Panel. Use care when handling the Window
Armor Panels to avoid breaking / chipping / scratching them.