
TM 5-2330-325-13&P
0065
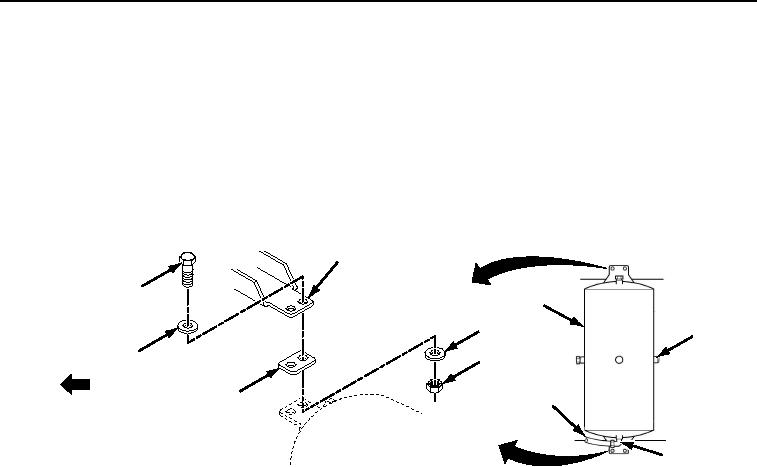
REMOVAL
1.
Tag and disconnect air hose (Figure 1, Item 6) from elbow (Figure 1, Item 5) and seal air hose with tape.
2.
Remove elbow (Figure 1, Item 5) from air reservoir (Figure 1, Item 3) and seal opening with tape.
3.
Seal reservoir outlet (Figure 1, Item 4) to spring brake control valve with tape.
4.
Remove four bolts (Figure 1, Item 1), eight washers (Figure 1, Item 8), four self-locking nuts
(Figure 1, Item 7), and two gaskets (Figure 1, Item 9) from air reservoir (Figure 1, Item 3) and semitrailer
frame (Figure 1, Item 2). Discard self-locking nuts (Figure 1, Item 7) and gaskets (Figure 1, Item 9).
5.
Lower and remove reservoir (Figure 1, Item 3).
2
1
3
8
4
FRONT OF
VEHICLE 8
7
9
6
5
466-0069
Figure 1.
Rear Reservoir Removal.
END OF TASK
CLEANING
CAUTION
To prevent contamination of air system components, drain water from reservoir after
cleaning. Failure to comply may result in damage to, or destruction of, equipment
or mission.
1.
Clean mud and dirt from exposed surfaces with water and a stiff brush.