
TB 9-2320-302-13&P-3
COMPRESSOR REPLACEMENT - CONTINUED
0016 00
INSTALLATION - CONTINUED
2.
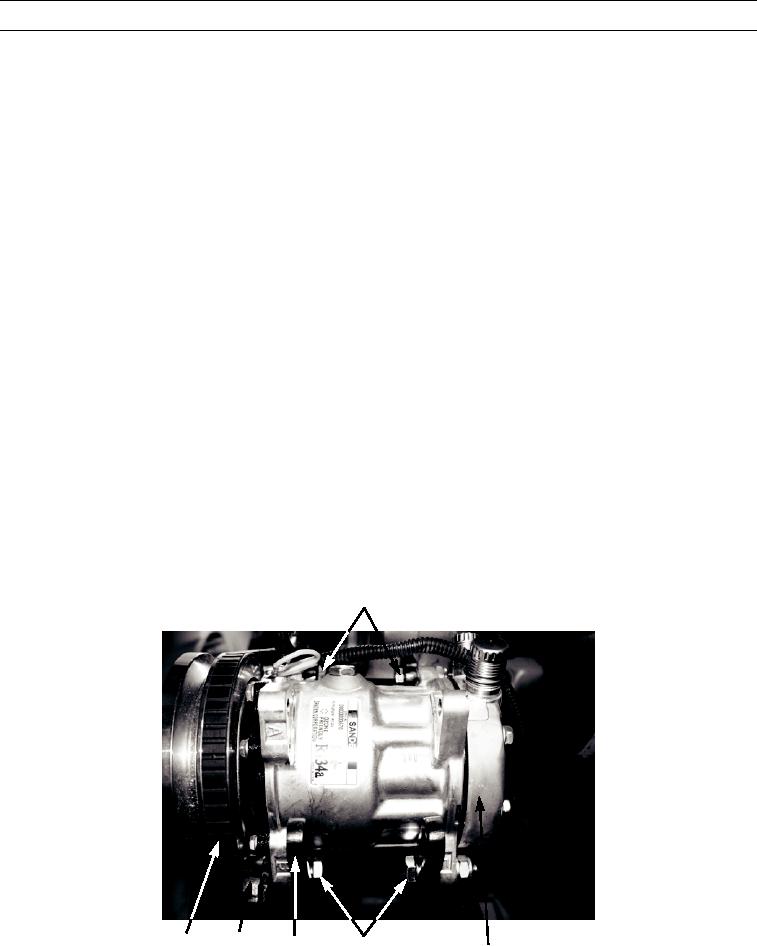
Install compressor (1) on compressor mounting bracket (15).
NOTE
Leave bolts loose enough so that compressor can slide on mounting bracket.
3.
Loosely install adjusting plate (16), two bolts (12), washers (13), and new locknuts (14) on compressor (1).
4.
Loosely install two bolts (10) and new locknuts (11) on compressor (1).
NOTE
Install drive belt in pulley groove noted in removal.
5.
Install drive belt (17) on compressor (1).
NOTE
Belt tension gage indication should be 120 lb (534 Newtons) for new belts and 90 lb (400 Newtons) for
used belts.
Belts are considered used if they have more than 30 minutes of operation.
Make sure compressor does not tilt during belt tensioning.
6.
Using breaker bar in adjusting plate (16), adjust drive belt (17) tension.
7.
Tighten adjusting plate (16), two bolts (12), washers (13), and new locknuts (14) to 35 lb-ft (47.5 Nm) on compressor
(1).
8.
Tighten install two bolts (10) and new locknuts (11) to 35 lb-ft (47.5 Nm) on compressor (1).
9.
Check drive belt (17) tension and adjust as required.
10,11
449-065
16
17
15
12,13,14
1
0016 00-6