
TB 9-2320-279-13&P-3
FIELD LEVEL MAINTENANCE
REAR DOOR DEADBOLT LATCH AND LINCH PIN ASSEMBLY REPLACEMENT
INITIAL SETUP:
Tools and Special Tools
References
Tool Kit, General Mechanic's: Automotive
None
(WP 0034, Item 3)
Equipment Condition
Materials/Parts
Vehicle parked on level ground or wheels
chocked (TM 9-2320-279-10)
Lockwasher (WP 0036, Item 6)
Locknuts (2) (WP 0036, Item 3)
Engine off (TM 9-2320-279-10)
Batteries disconnected (TM 9-2320-279-20)
Personnel Required
MOS 63B Heavy-wheel vehicle mechanic
REMOVAL
NOTE
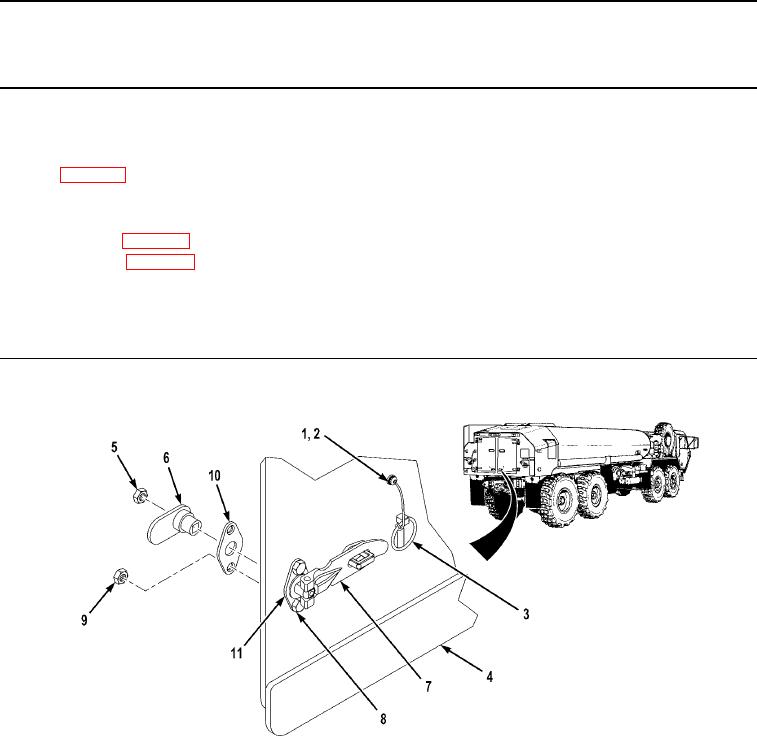
Both right rear door deadbolt latch and linch pin and left rear door deadbolt latch and linch pin
are removed the same way. Right rear door deadbolt latch and linch pin shown.
1. Remove screw (1), lockwasher (2), and linch pin (3) from rear door assembly (4). Discard lockwasher.
2. Remove nut (5) and cam latch (6) from deadbolt latch (7).
3. Remove two screws (8), locknuts (9), one rear plate (10), front plate (11), and deadbolt latch (7) from rear
door assembly (4). Discard locknuts.
END OF TASK
0011-1