
M1070 HET ARMOR KIT
II113400
Rev. D
4. Install right firewall panel assembly as follows (see Figure 3-55):
NOTE
Prior to installation of the right firewall panel assembly, the heater hose elbows
(protruding from the firewall) must be reversed. The long end of the rubber
hoses must be connected to the elbow so that the short end of the elbow will
extend out far enough to pass through the right firewall panel assembly.
Power steering hoses may need to be adjusted and secured in order to provide as
much relief from the firewall armor panels as possible.
a. Using appropriate lifting device, hardware, and personnel, lift right firewall panel assembly into position
onto the cab and pass two heater hoses, heater control cable, and windshield washer reservoir tubes
through right firewall panel assembly.
b. Ensure right firewall panel assembly is correctly positioned and secure to power steering bracket studs
using eight flat washers (1) and locknuts (2). Do not tighten locknuts at this time.
c. Install three bolts (3), six flat washers (4), and three locknuts (5) to connect doghouse bracket to firewall.
Torque bolts to 35 ft-lb.
d. Install two bolts (6), lock washers (7), and flat washers (8). Torque bolts to 23 ft-lb.
e. Install five flat washers (9) and locknuts (10). Torque locknuts to 13 ft-lb.
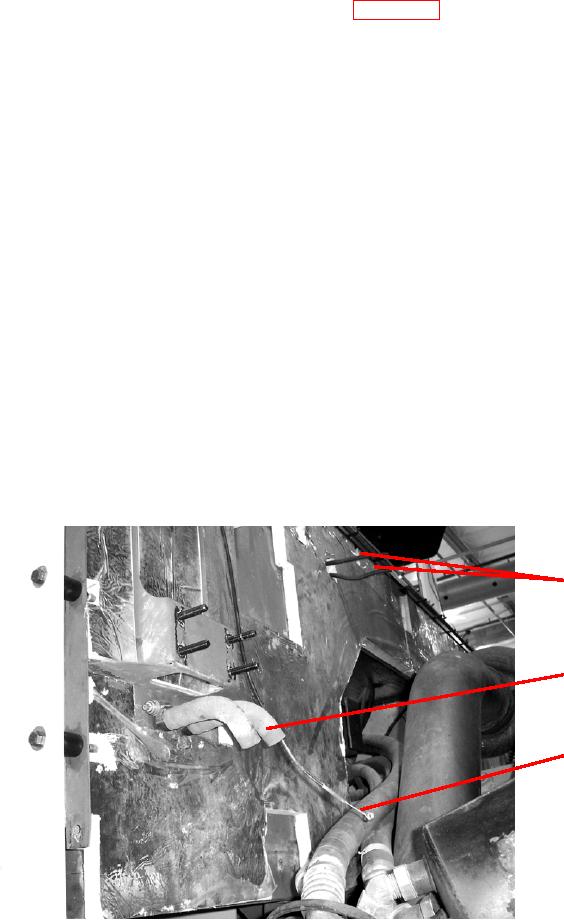
Windshield Washer
Reservoir Tubes
Heater Hoses
(Shown Reversed)
Heater Control Cable
Figure 3-55. Firewall Right Panel Assembly Installation (Sheet 1 of 2).
JUNE 2005

