
TB 9-2320-360-13&P-1
A/C HOSE SHUTOFF VALVES REPLACEMENT - CONTINUED
0053 00
REMOVAL - CONTINUED
N OT E
Removal procedures for two shutoff valves on the firewall are similar. O-ring sizes will very
Tag and mark all hoses and fittings prior to removal.
1.
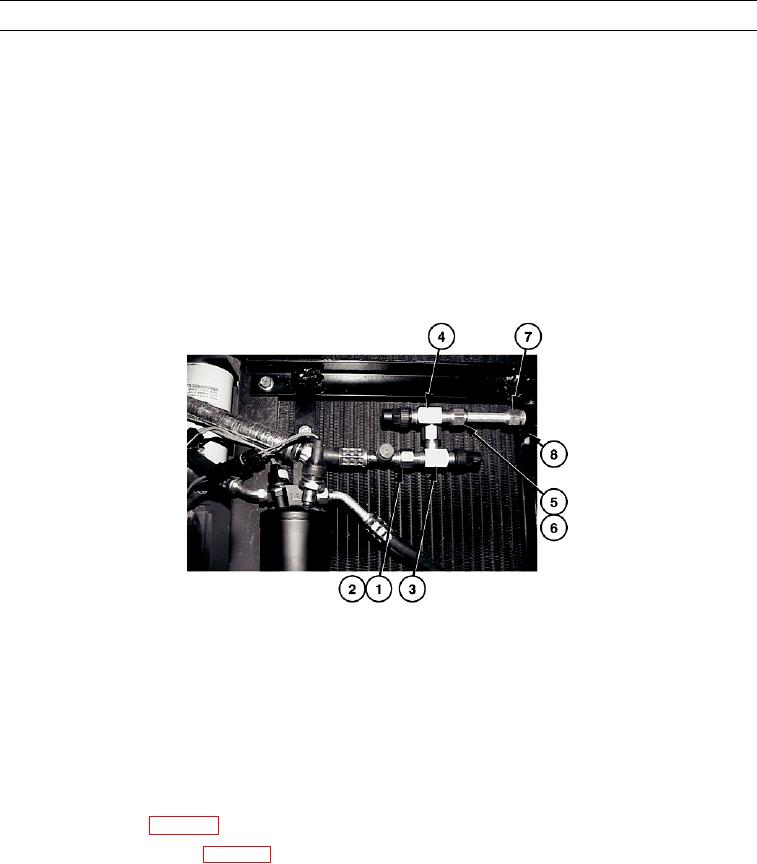
Remove #8 A/C hose (1) and #8 O-ring (2) from shutoff valve (3). Discard O-ring.
2.
Remove shutoff valve (3) from shutoff valve (4).
3.
Remove shutoff valve (4) and #8 O-ring (5) from straight adapter (6). Discard O-ring.
4.
Remove straight adapter (6) and #8 O-ring (7) from A/C condenser (8). Discard O-ring.
HETF00237
INSTALLATION
1.
Lightly coat new #8 O-rings (2, 7, and 5) with refrigerant compressor oil.
2.
Install new #8 O-ring (2) and #8 A/C hose (1) on shutoff valve (3).
3.
Install new #8 O-ring (7) and straight adapter (6) on A/C condenser (8).
4.
Install new #8 O-ring (5) and shutoff valve (4) on straight adapter (6).
5.
Install shutoff valve (4) on shutoff valve (3).
6.
Charge A/C system (WP 0056 00).
7.
Perform leak test inspection (WP 0038 00).
8.
Close hood (TM 9-2320-360-10).
9.
Remove wheel chocks (TM 9-2320-360-10).
END OF WORK PACKAGE
0053 00-2

