
TB 9-2320-360-13&P-1
A/C KIT INSTALLATION - CONTINUED
0003 00
FINAL COMPONENT ASSEMBLY - CONTINUED
0003 00
N OT E
While sliding evaporator assembly in doghouse, have assistant pull two A/C hoses forward through grom-
met hole on doghouse front engine access panel at intervals during installation. This will prevent A/C hoses
from becoming lodged in doghouse and damaging evaporator connections. This can be done by accessing A/
C hoses through alternator access opening.
e.
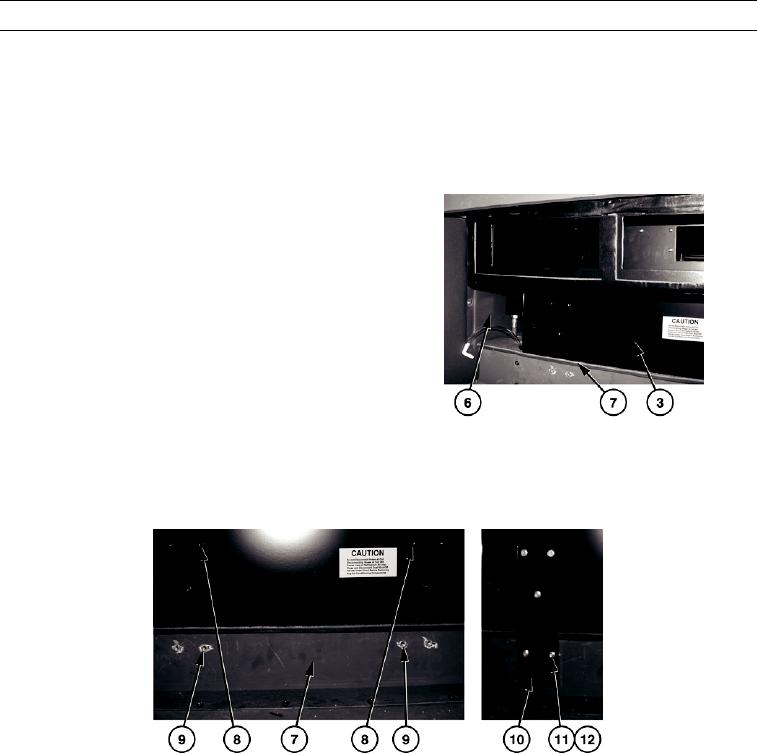
Tilt evaporator assembly (3) back slightly and
slide evaporator assembly (3) in doghouse (6)
until base is even with edge of step (7) in floor of
doghouse (6).
HETF00370
f.
Align evaporator assembly bracket mounting holes (8) with rivet nuts (9).
g.
Install two mounting brackets (10) with 10 screws (11) and washers (12). Tighten securely, but do not overtighten.
HETF00371
h.
Connect four evaporator assembly drain fittings (13) to drain hose elbows (14) using four 3/8-inch diameter x 3-
inch long drain tubes (15), provided with the kit.
i.
Connect A/C compressor-receiver/dryer harness connector (16) and A/C switch harness connector (17) to evapora-
tor assembly connectors (18 and 19).
0003 00-35

